Take a tour
Contents
Objective
The feature aims at easing the Seller Center on-boarding process for new sellers and driving adoption of new features for existing sellers.
- It reduces the workload of ventures spent on educating sellers on how to use Seller Center
- Take a tour can be used to cover basic must-know functionalities (e.g. order processing and products creation) but also to reduce complexity in learning and explaining any complex feature that Seller Center has to offer (also on admin side)
Setup
In order to activate the feature, please create a ticket in TMLSD. The configuration which needs to be enabled is tour/enabled.
Please note that admin access to editor and tour overview is a separate ACL Resource (‘Take a Tour’). It is configured by default for admin and maintenance users. If you are not able to access the overview after enabling the feature or wish to distribute it to other classes of users, please create a ticket in TMLSD.
Create a tour
| Step | Description | Image |
| Open the editor | Navigate to Administration > Settings > Take a tour and click blue button ‘Open Take a tour editor’ |
|
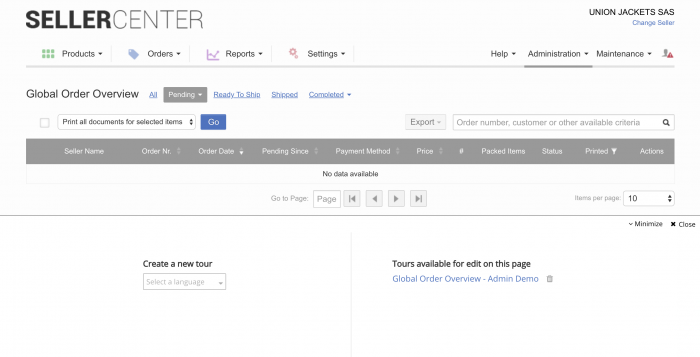
| Navigate to the page where you want to create a tour |
Once your toolbar is open, you can navigate to any page within Seller Center to create a tour. While changing the page pattern, the toolbar will minimise (small pink icon in the right bottom corner). You can then maximise the toolbar to enter editor again or close it fully by clicking on the ‘x’. Limitations: 1. Please note that tours can only be created on a single page pattern. This means that while a tour is being created, edited or displayed for user , it will never browse through different pages. To mitigate this limitation, you can use screenshots in step content or create separate tours on different pages. 2. Please avoid very specific pages which have complicated access paths (e.g. products attributes depending on selected categories) as they will only be visible for users who repeat the exact same path. Focus on pages with unified access path first. |
|
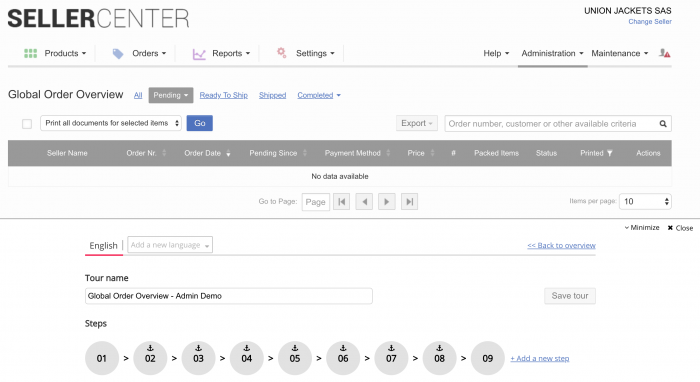
| Access step editor mode | Once your editor is maximised, you can create a new tour in a chosen language or edit tours available on the page which you are currently visiting. In both cases, you will be brought to the actual editor. |
|
| Step Editor Mode |
You are now in the actual editor. It allows you to:
|
|
| Manage Languages |
Please note: Each tour is language-specific (Fallback mechanism is explained in this article below). To add a new language for a specific tour, please pick it from the dropdown menu on the top of the editor (You can also delete it afterwards). |

|
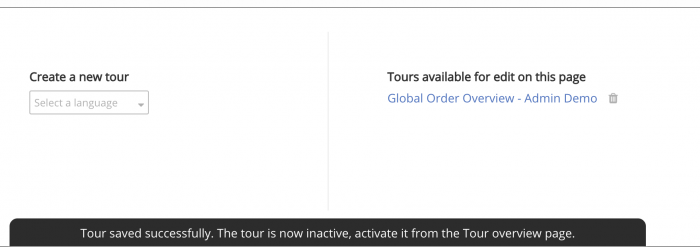
| Save |
When editing process is finished, you can save your tour. Please note that each newly saved tour (also edited) will become automatically inactive. This feature protects from displaying unfinished tours to sellers. If you wish to make it visible for sellers directly, please activate in Tour Overview (Administration > Settings > Take a tour) |
|
Tour Steps Editing Details
Each step can be edited in Editor Mode after clicking on the relevant step icon (circle).
Steps consist of:
- Title & Other Content (including editable text and pictures)
- Highlighted HTML objects (not obligatory)*

*Rules to pick a relevant HTML object to highlight:
- Anchors picked in the static portions of the page (main menu, filters, table headers and top button) will always be displayed.
- Anchors picked in non-static parts of the page which are dependant on the seller specific data (products, orders) will only be displayed for sellers who have equivalent data displaying on the page (e.g. Ready to ship action picked on the the first order line, will only be displayed to sellers who have at least 1 order). Hence the recommendation is to pick top row in the data tables if necessary.
- If the anchor element is not found, but the page is linked to the tour, the content will be displayed in the middle of the screen with no anchor as it happens when no anchor is assigned.
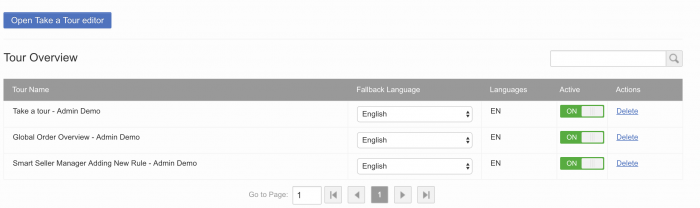
Tour Overview
To view and manage all created tours, please go to Administration > Settings > Take a tour.
Here, you can see the list of all the tours which have been created (along with their languages) and manage them:
- Set fallback language
- Activate / deactivate (re-activation necessary after each change)
- Delete

Limitation:
To edit a tour, please click ‘Open a Tour Editor’ and browse to the page with a relevant tour.
Fallback Language Mechanism
Fallback language setting is available in Tour Overview (Administration > Settings > Take a tour) and can be set per tour. This feature applies only for users whose language is not available within tours languages.
- ‘Do not display’ option makes tour visible only for users who have the same language as the languages of the tour (no widget will be appear if user language is different than available tour languages).
- Selecting any language from the dropdown menu (list covers all available language of the specific tours) sets the language as the fallback language, which will be forced to display for users whose language is different than any of available language for the tour. It is recommended for the multi-language countries which decide to create tours only in one language.
User Display
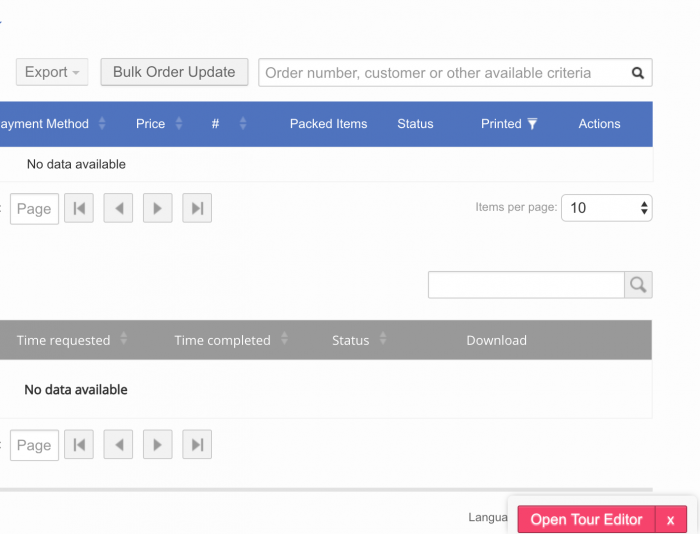
User can display previously designed tours on demand after expanding the Take a tour widget in the left bottom area of the page.
The widget will be visible to users at all times in a specific page if any tour is created and activated for the page (in user’s language or in fallback language if applicable)
Once widget is expanded, user can browse tours to play for a specific page and activate display by clicking the name.
Expanded widget:

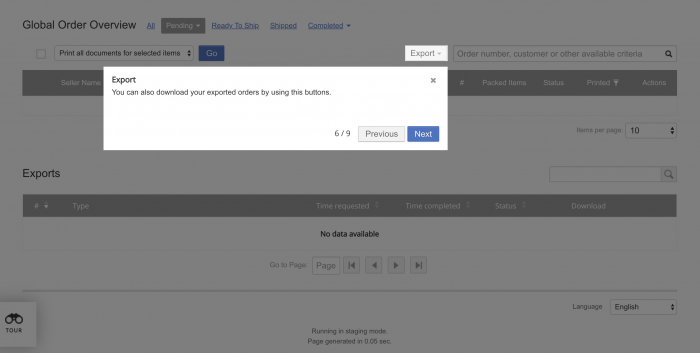
Displayed step of a tour: