Seller Rating
Contents
Objective
- As an admin, I want to set up the Seller Rating feature for the Sellers.
- As an admin, I want to set up the Seller Ranking feature.
- As an admin, I want to decide which KPIs will be available for the Sellers.
- As an admin, I want to setup the ranges for each KPI.
- As an admin, I want to weight the KPIs.
- As an admin, I want to define the KPI calculation periods.
- As an admin, I want to test the setup.
- As an admin, I want to export the Seller Rating feature results.
Critical Knowledge Seller Rating:
-
For feature enabling, please raise a TMLSD ticket. The parameter that needs to be enabled is seller_rating/enabled
-
Seller Rating can be enabled to be only visible for Admins or for all users (so also seller are able to see their rating)
- Configuration setting that also seller can see their rating needs to be set to 2
-
Seller Rating can be enabled to be only visible for Admins or for all users (so also seller are able to see their rating)
- Changing Seller rating (e.g., setup, levels or KPIs) will not be reflected immediately.
- Changing a KPI will not change the view for the Seller because they will receive the values of the last-calculated period displayed
- Calculations will be performed at the end of each period.
- New KPIs have to be developed by the Seller Center development team.
Seller Rating – Quick Setup
To set up the Seller Rating feature, please follow these short notes. For more details, refer to the detailed paragraphs.
- Go to Administration > Seller Rating Setup
- Click on “Settings” to set up the following: calculation frequency, KPI range names, and the rating level names.
- Go to the KPI selection and add the KPIs you would like to use for Seller Ratings.
- Follow the red exclamation marks to “KPI Range Setup” and add the ranges for the specific KPI.
- Follow the red exclamation marks to the “KPI Weight Setup” and add the requirements for the KPI for each level.
- Afterwards, submit and save your KPIs.
- Seller Ratings will now be visible for Sellers.
- Computed results will appear at the end of the period (one week after the current week ends).
Seller Rating – Ranking Setup
- The general setup of Seller Ratings consists primarily of deciding the visibility of Seller Ratings to the Seller.
- KPI ranges, Seller levels, and icons can be customized.
-
The setting with the highest impact is the frequency of calculation.
- This determines how much data will be aggregated.
Critical Knowledge Hint:- Changes on Seller Rating (e.g., setup, ranking or KPIs) will not be reflected immediately.
- They will appear after the next computation (based on configured general settings).
- If the Seller has no Seller Rating data to be displayed (because their data is empty), the default account health will be shown.
# Description Image 1 - Go to Administration > Seller Rating Setup
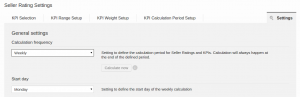
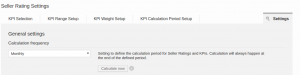
2 - Go to settings.
3 -
Calculation Frequency
- “Weekly”: KPIs will be calculated on the configured start day of the previous week.
- “Monthly”: KPIs will be calculated on the first day of the previous month.
-
Display KPI ratings
- “Display Names”: displays the achieved KPI range name.
- “Display Values”: displays the calculated value.
- “Display Values and Names”: display both name and value.

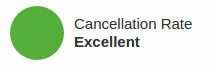
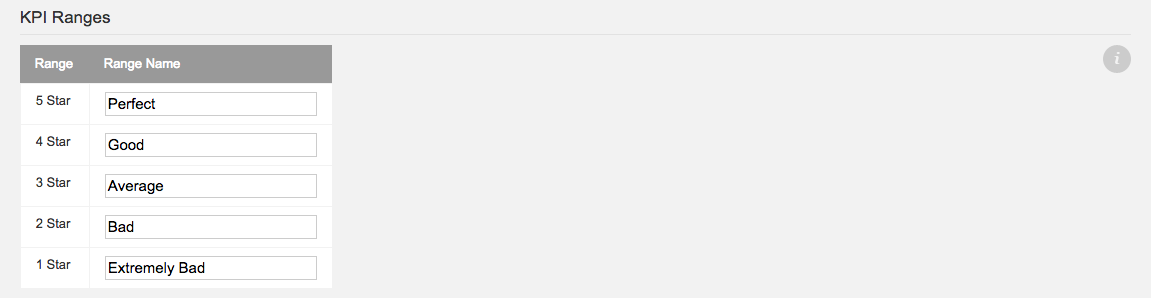
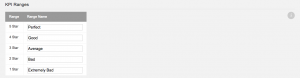
4 - The result of each KPI calculation falls in a range.
-
There are five ranges, which have a standard setup by default:
- 5 Stars = Excellent
- 4 Stars = Good
- 3 Stars = Average
- 2 Stars = Bad
- 1 Star = Extremely Bad
- Range names can be customized.
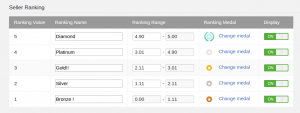
- Sellers achieve a “Seller score,” which is the aggregation of different KPIs.
- Seller score is reflected as a Seller ranking.
-
There are five rankings, which have a standard setup by default:
- Level 5 = Diamond
- Level 4 = Platinum
- Level 3 = Gold
- Level 2 = Silver
- Level 1 = Bronze
- Ranking names can be customized.
- Ranking ranges can be customized.
- Ranking medals can be customized.
- Display for each ranking can be customized.
- Final results of score and medal will be shown in header.
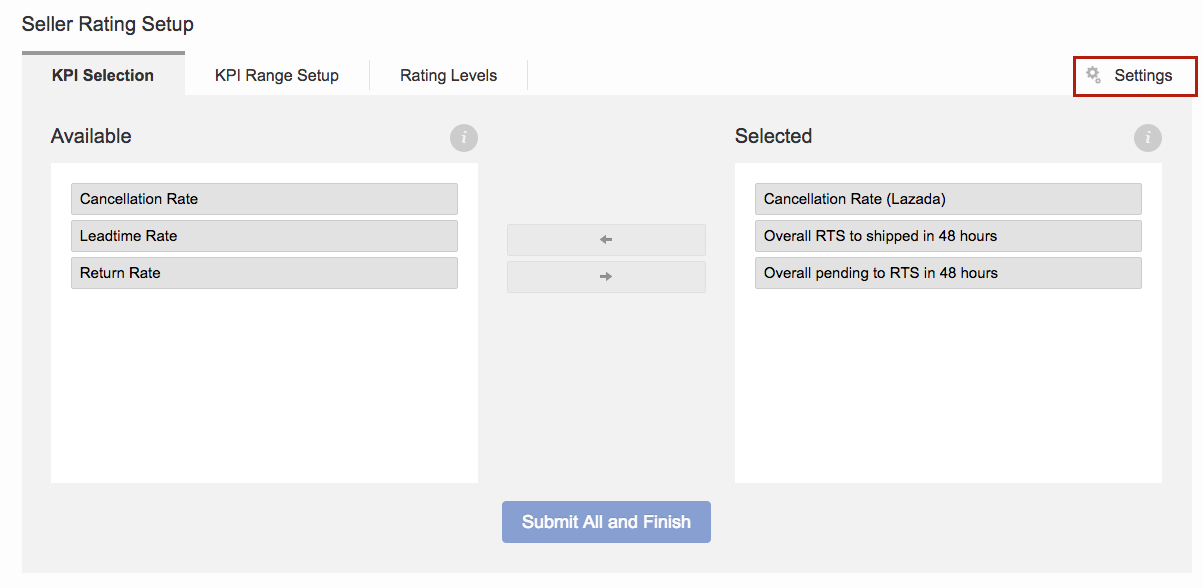
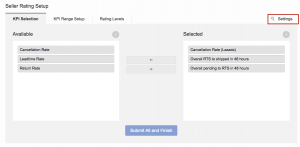
Seller Rating – KPI Selection
- KPI selection allows you to decide which KPIs should be part of the rating calculation.
Critical Knowledge Hint:- Changes on Seller Rating (e.g., setup, ranking, or KPIs) will not be reflected immediately
- They will appear after the next computation (based on configured general settings).
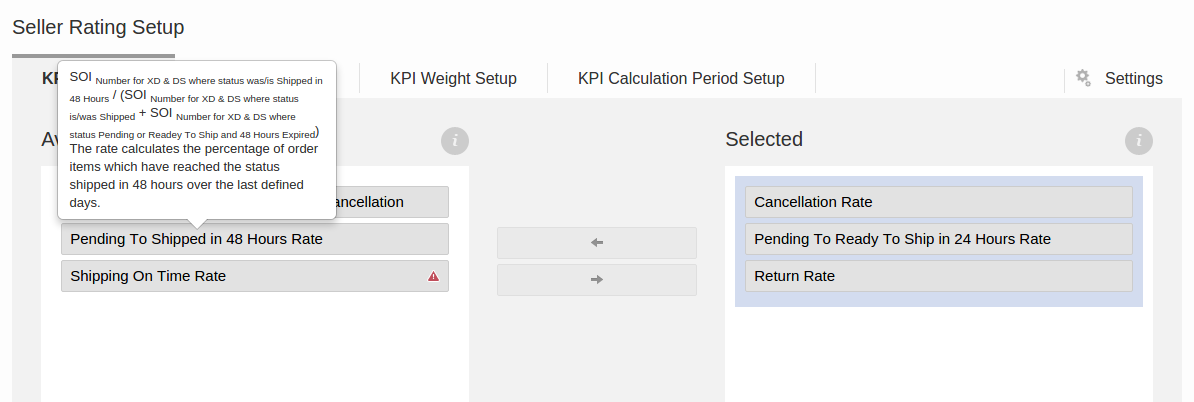
# Description Image 1 - Go to the Seller Rating Setup > KPI Selection
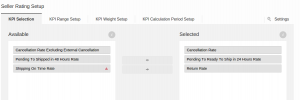
2 - Mouse over the display tool tip to see the KPI’s formula and a short description.
- If another feature limits the KPI, a warning will be displayed.

3 - Add a KPI by moving it from “Available” to “Selected”
- Remove a KPI by moving it from “Selected” to “Available”
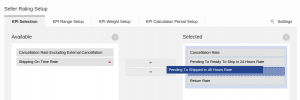
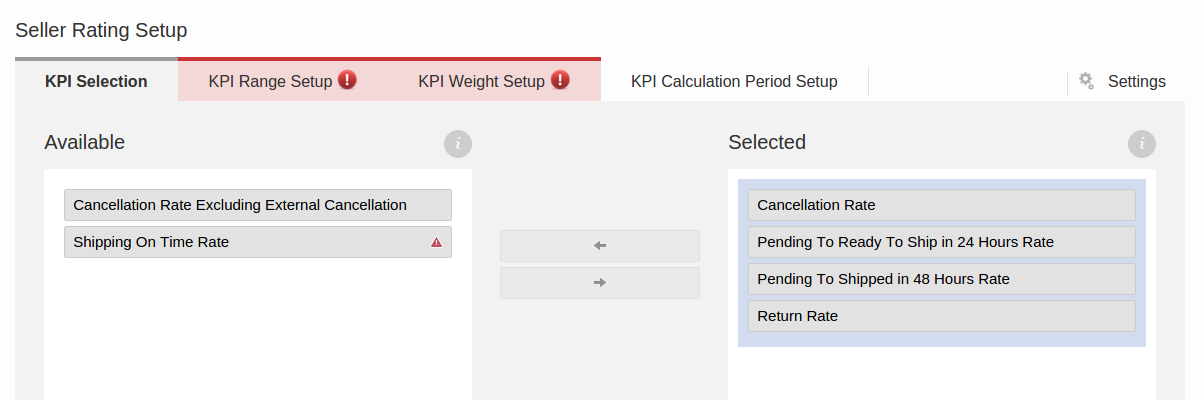
4 - After adding or removing a KPI, the range setup and the rating level setup need to be completed.
- Missing areas will be highlighted with a red exclamation mark.
- Saving is only possible after the setup completion is done.
- Continue the setup in Seller Ratings > KPI Ranges

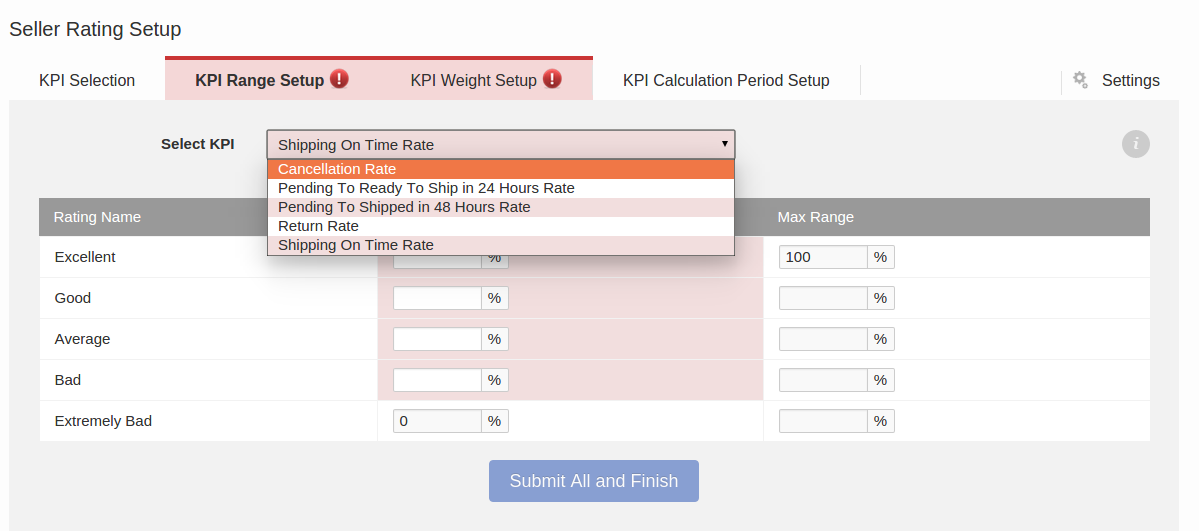
Seller Rating – KPI Range Setup
- Each KPI has a range of five levels. The names can be defined in the setup.
-
To set up a KPI, there needs to be a minimum and maximum range for each level.
-
Example:
- 0% to 5% = Extremely Bad
- 5% to 10% = Bad
- 10% to 20% = Average
-
Example:
- If the calculation falls exactly between levels, it will be rounded in the Seller’s favor (e.g., in case of 10%, the Seller will be in the “Average” level).
Critical Knowledge Hint:- A low rate is better than a high rate for some KPIs (e.g., Cancellation rate). The favoring engine takes this into consideration when rounding in the Seller’s favor.
# Description Image 1 - Go to Seller Rating Setup > KPI Range Setup
- KPI ranges need to be set up for each KPI.
- KPI ranges that need to be specified will be highlighted.
- Only “Min Range” needs to be filled; “Max Range” is auto-filled.
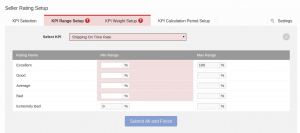
2 - Filling all ranges with values will remove the highlighting.
- Step 1 might need to be repeated for each KPI.
- Failing KPIs are highlighted.
- Certain KPIs needed to be filled in the opposite way (e.g., Cancellation rate at 100% would be labeled as “Extremely Bad”).

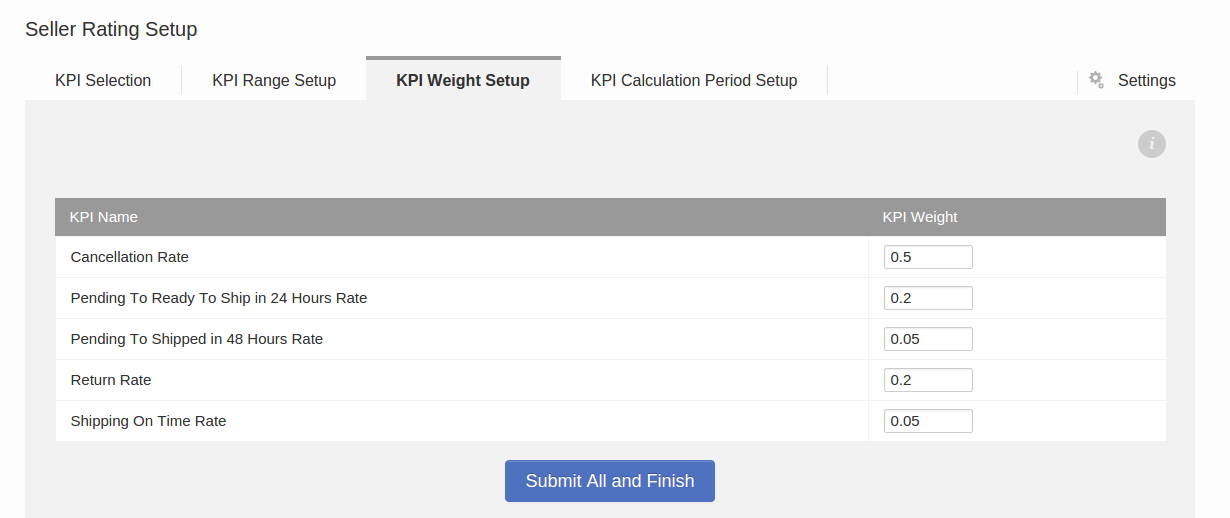
Seller Rating – KPI Weight Setup
- KPIs can be weighted to each other.
- The weights will define the formula to calculate the Seller Rating score.
Critical Knowledge Hint:- Sum of all values must be 1
- Each KPI needs to have a value > 0
- Weight can be configured as a two digit number.
# Description Image 1 -
- Go to Seller Rating Setup > KPI Weight Setup
- Configure a weight for each KPI.
-
Example:
- 50%: Cancellation rate
- 20%: 24 Hours Ready to Ship
- 20%: Return rate
- 5%: 48 Hours Shipped
- 5%: Shipping on Time rate

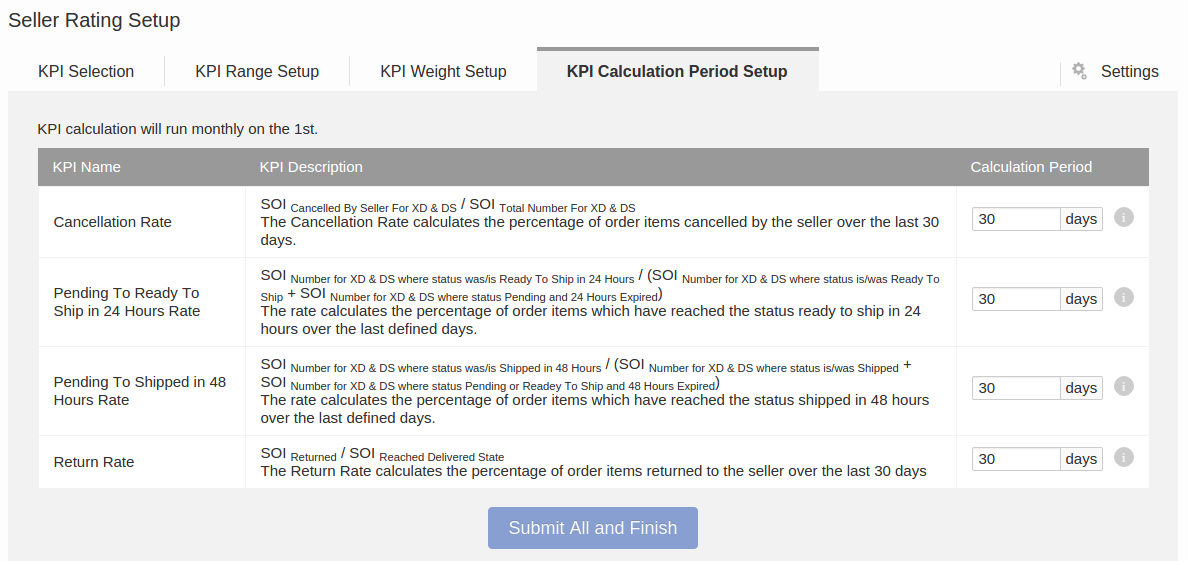
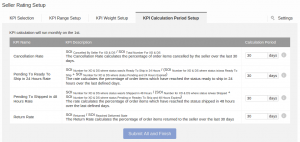
Seller Rating – KPI Calculation Period Setup
- KPI calculation period can be configured per KPI and defines which data to use for each KPI calculation.
# Description Image 1 - Go to Seller Rating Setup > KPI Calculation Period Setup
- Intro text of when the next automatic calculation will be run is displayed.
- Insert the days to use for calculation.
- Days need to be between 1 and 365.
Seller Score – Calculation, Visibility & Testing
- After successful setup, run the calculation via the “Calculate Now” button in settings.
- During the period of calculation, no data will be shown.
Critical Knowledge Hint:- The first period should be used by admins for testing. Ask the Berlin team to configure visibility only for admins. After the first period, you can enable it for all users so that each Seller sees the achieved ranges and accumulated Seller score.
- There will be no Seller score calculated if any of the selected KPIs do not provide a result.
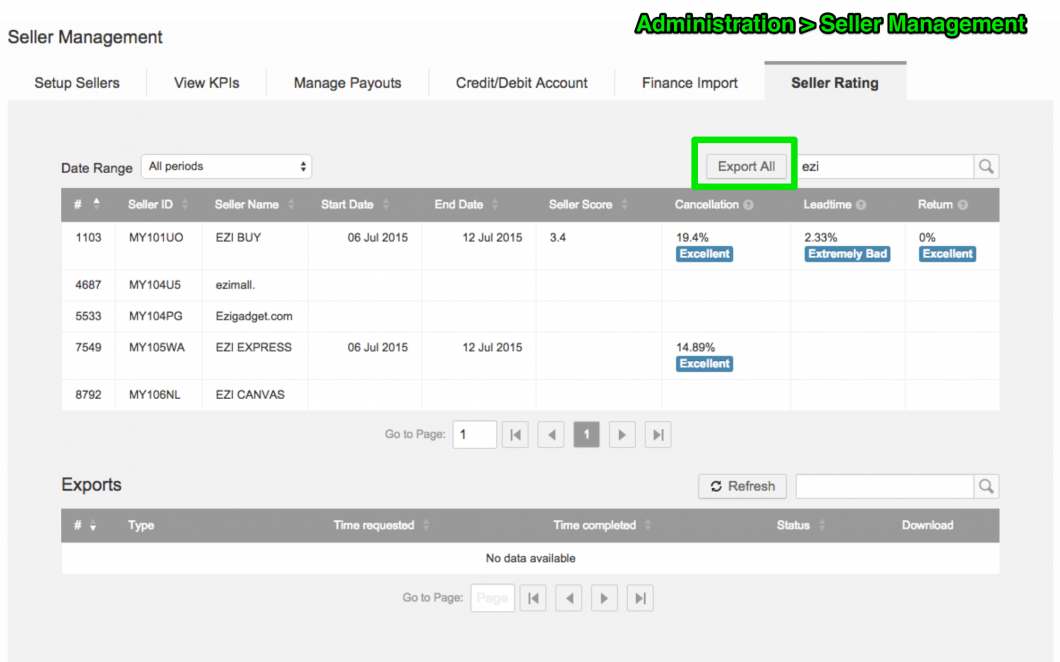
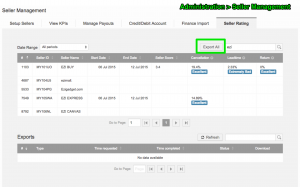
Seller Rating – Export
- Seller Rating overview of the Sellers’ KPIs is provided for admins.
- If a Seller does not have any KPIs calculated for this period, there will be no data for this Seller.
- CSV export option is available.
# Description Image 1 Go to Administration > Seller Management > Seller Rating
The overview of Sellers’ performance with an export option is available.
-
For feature enabling, please raise a TMLSD ticket. The parameter that needs to be enabled is seller_rating/enabled