Product Quality Control
Contents
Objective
- Provide an easier workflow for Product Quality Control.
- Allow mass approval or rejection.
- This goes hand in hand with reactive rejecting.
- Create better visualization on important attributes and images.
- Allow all products from specific Seller to be approved (or rejected) at once if you are confident enough that the products fits (or does not meet) the requirements.
Page Structure
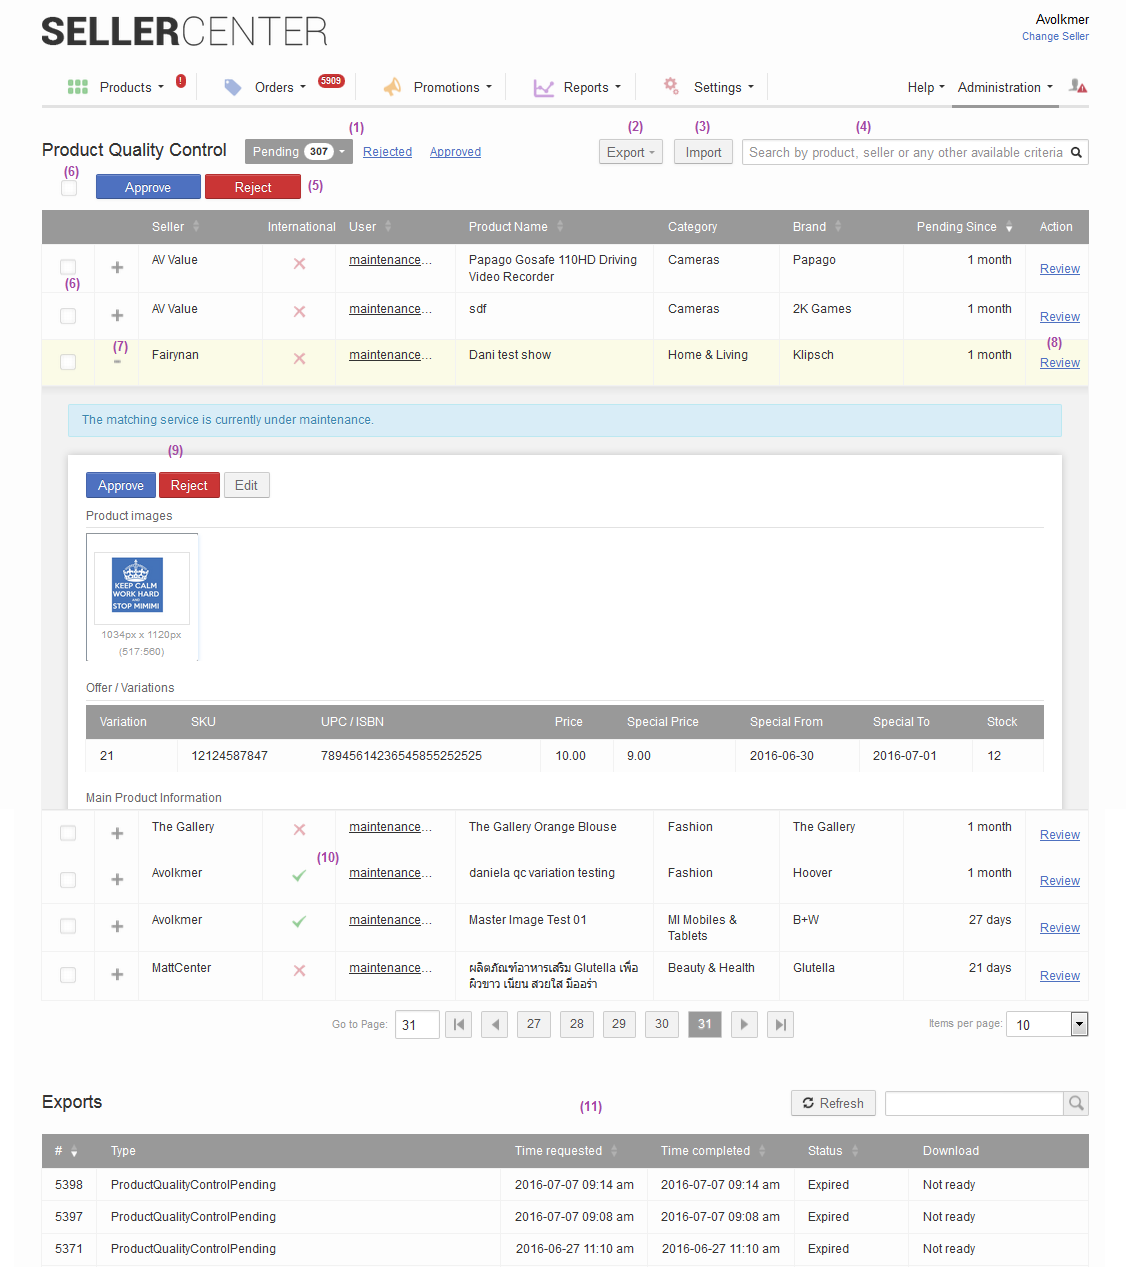
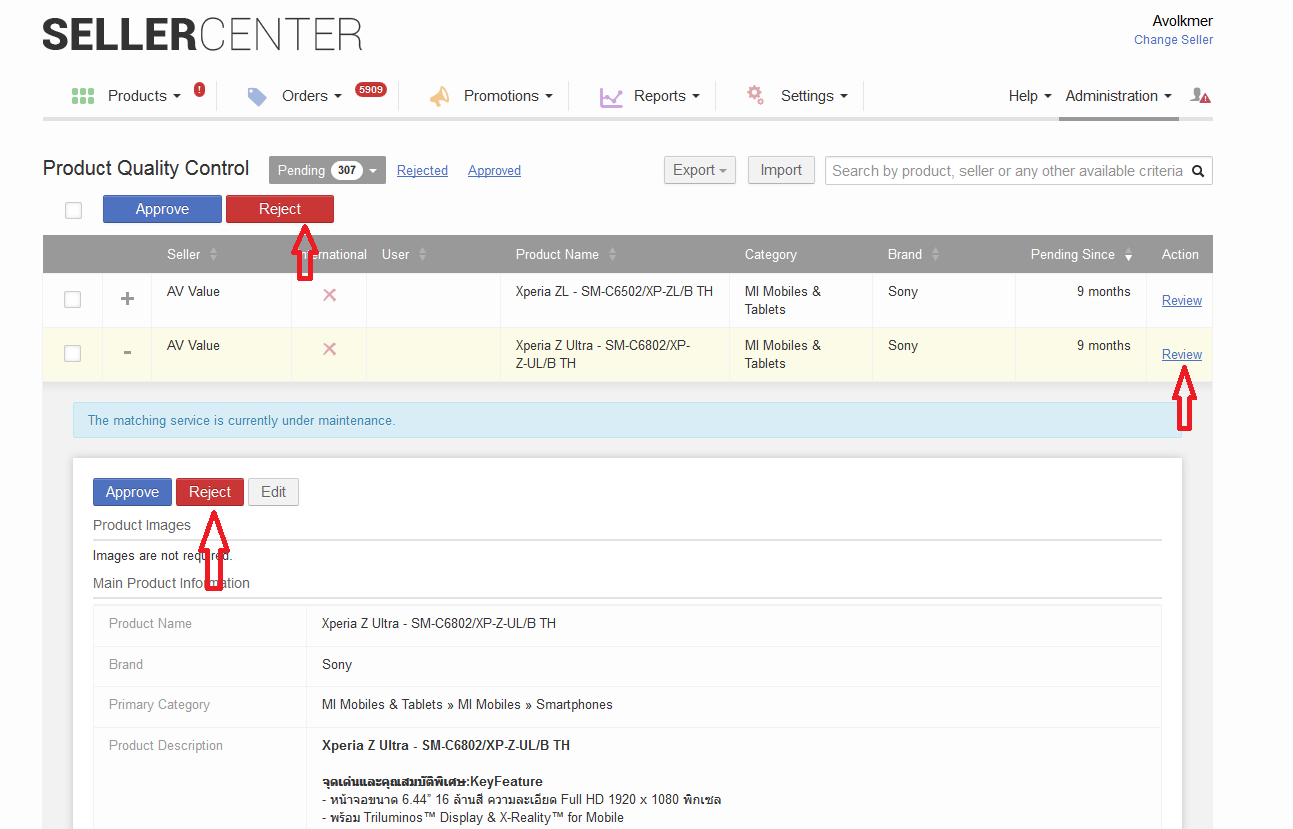
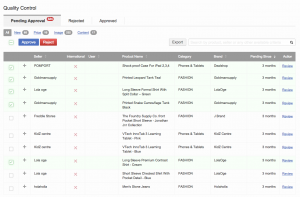
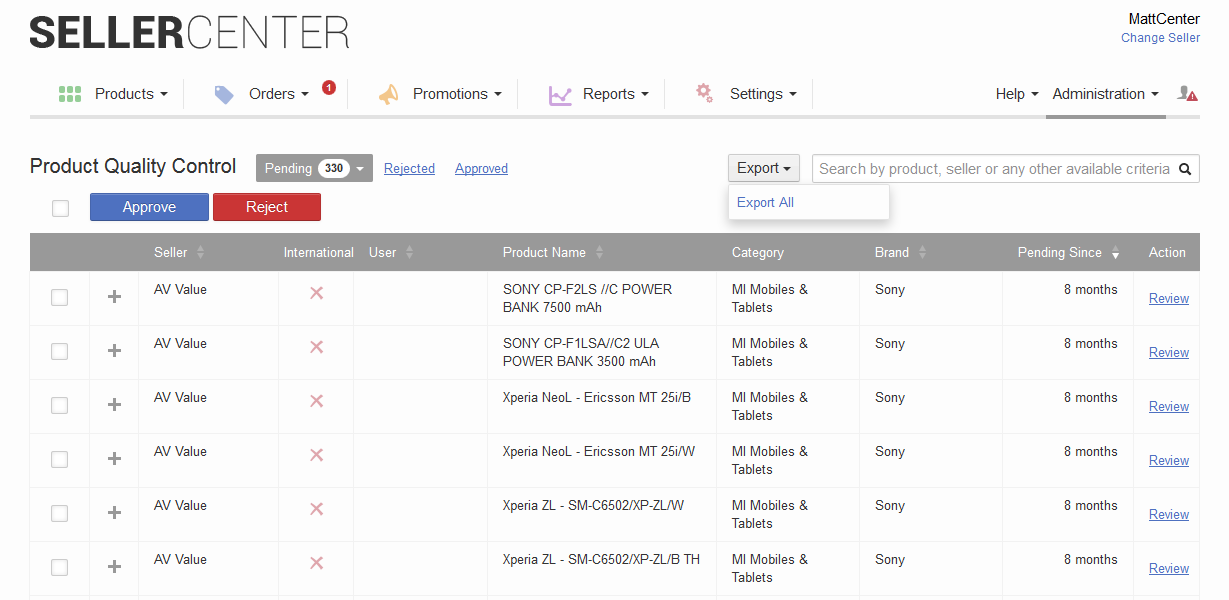
The Product Quality Control functionality can be found under Administration > Product Quality Control
The overview page offers the following functionality:
|
(1)
Filter options to see the product status:
(2)
Export option (all pending of the current page, or filtered results)
(3)
Import functionality
(4)
Search functionality
(5)
“Approve” and “Reject” buttons for bulk updates
(6)
Single or mass select for products in order to approve or reject.
(7)
Expand (+) and Collapse (-) functionalities to see product data
(8)
“Review” button to open a new page and see the entire product content and its changes
(9)
“Approve,” “Reject” and “Edit” functionalities for this particular expanded product.
(10)
Updated or new product data displayed.
(11)
Export table
|
|
Approve Product
| Step | Description | Image |
| 1 |
The following options are available to approve a product:
|
|
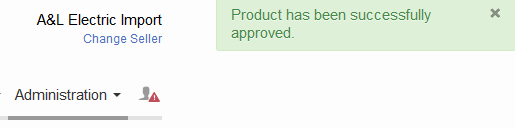
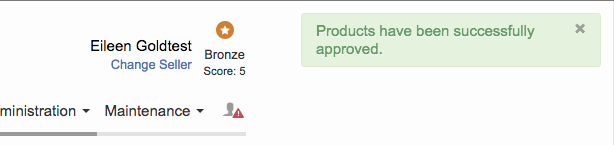
| 2 | The success message is displayed in the top right corner. |
|
Reject Product
| Step | Description | Image |
| 1 |
The following options are available to reject a product:
|
|
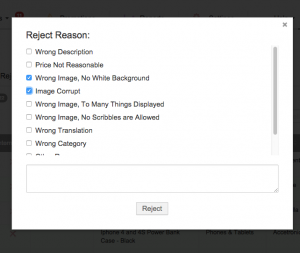
| 2 | Choose the reason for rejection and enter a comment if needed. |
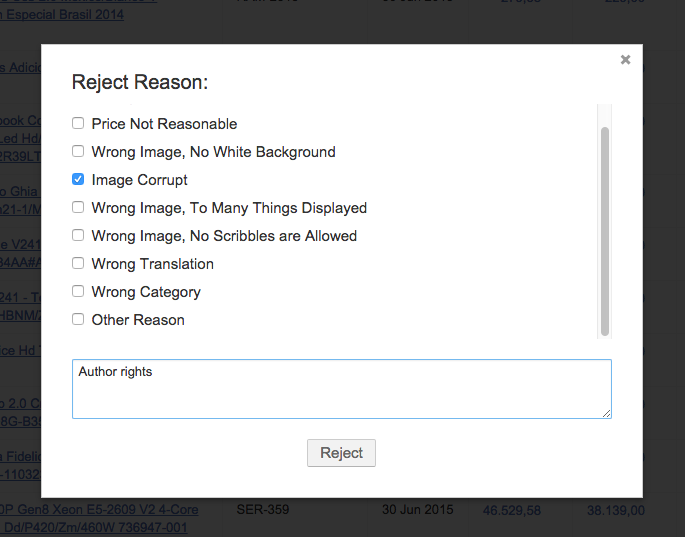
|
| 3 |
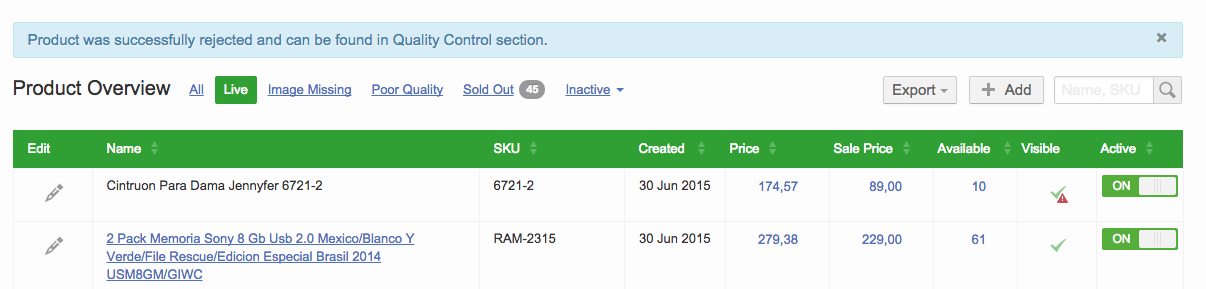
Product will be rejected successfully and marked as inactive. It will be moved to quality control under “Reject” filter. Changes will be rejected and previous version will stay in the Shop (if the product was approved before).
|
|
| 4 | If the specific product is already under quality control, a notification message will be displayed. |
Read here about how to take a product offline from the Shop and, if required, set it to not authorized.
Export of Pending Products
The export functionality provides two options for exporting data: either export all products that are currently pending approval, or export the filtered products.
In order to export all product data, go to Administration > Global Product Overview. Use the filter for Inactive > Quality Control Pending. From there, products can be exported based on their attribute set.
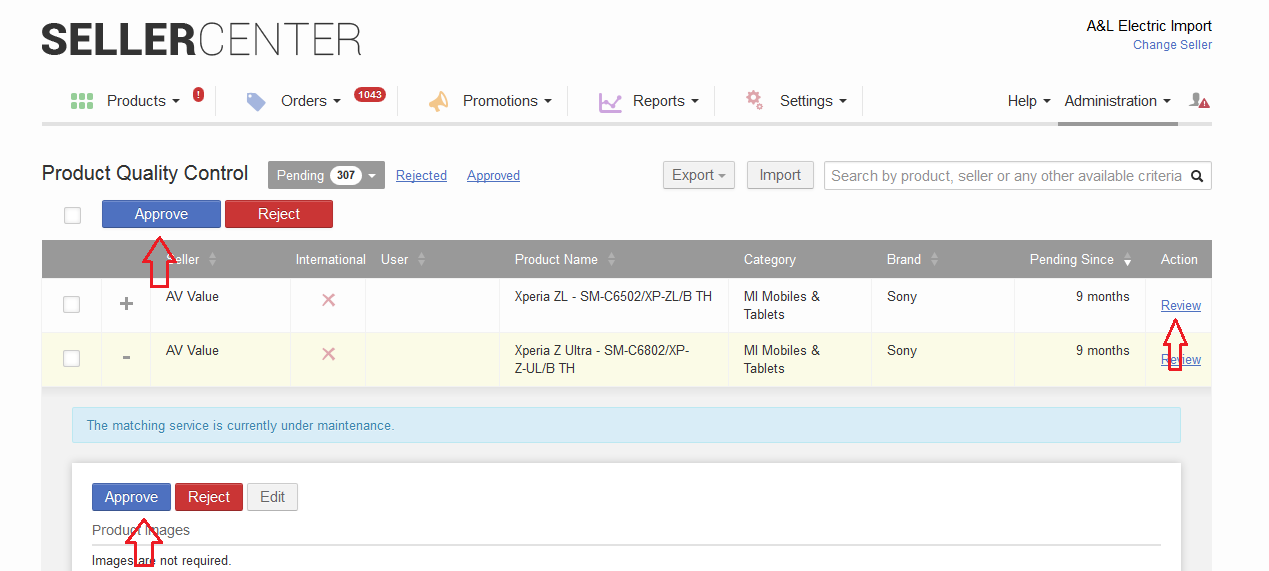
Review Detail Page
|
A review page can be accessed from the Pending Approval Overview page for each product. Basic product information, product images, variations, and other data are listed. Approval and rejection is possible. Updated content will be highlighted. |

|
Accordion for Product Details
| Step | Description | Image |
| 1 |
Go to Administration > Quality Control Click the “+” icon to review only the changes that require approval. |

|
| 2 |
Each product can be approved directly if all the information required to take the decision is already listed. Confirmation message will appear in the right corner. |

|
| 3 | In case of rejection, a popup with rejection reasons will be displayed. |
|
Display of Changes
In the accordion for product details, changes are highlighted in red and green, similar to the Quality Control Review page (which can be accessed by clicking “Review”)
- Green mean that new content has been added to the product.
- Red means that content has been removed.
- Yellow/orange means that that the formatting (e.g., from bold to italic) has been changed but the content itself is the same.
If a product does not show any changes, this indicates that it is a completely new product does not yet exist in the Shop system. When checking the Quality Control Review Detail page, the Shop SKU will be missing.
Bulk Approval and Rejection
With increased amounts of Sellers and an increased amount of products, it is necessary that products are reviewed and approved or rejected quickly.
In the Interface
| Step | Description | Image |
| 1 |
Possibility to massively approve or reject products by selecting desired product(s) and then clicking “Approve” or “Rejected”
|
|
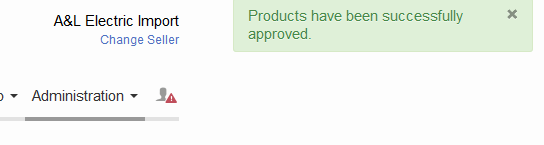
| 2 |
Successfully approved.
|
|
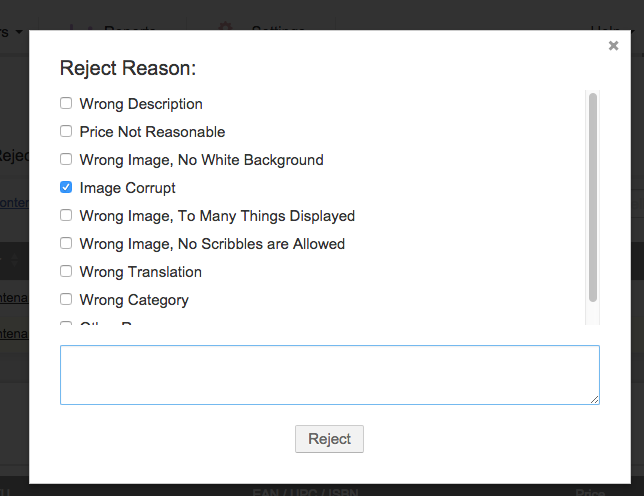
| 3 | Same rejection reason will be used for all items. |
|
| 4 |
Successfully rejected.
|
|
Mass Upload via CSV/XLSX Files
| # | Description | Image |
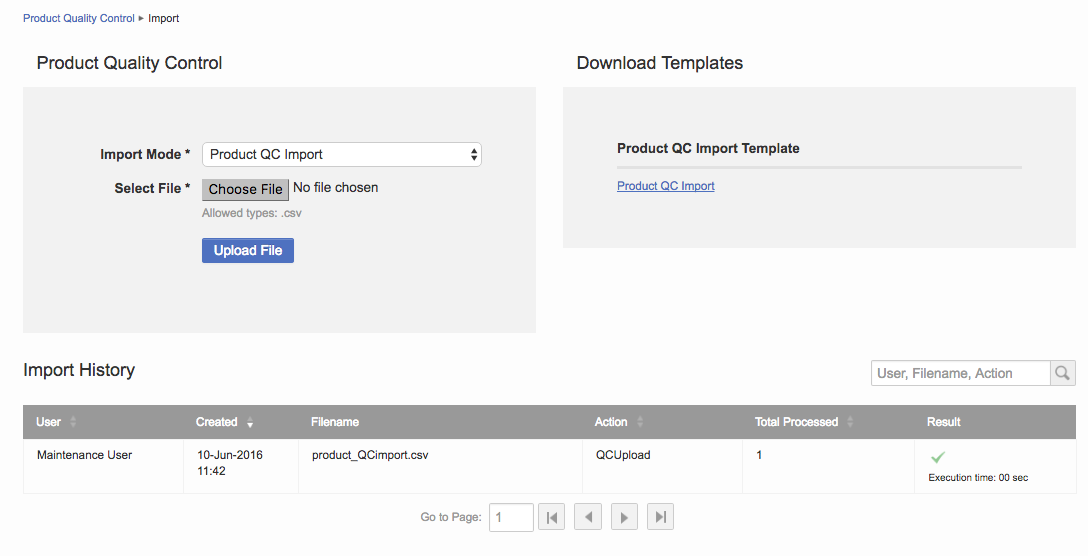
| 1 |
In the “Pending” tab: Choose “Export” to download the pending Product Quality Control.
|
|
| 2 |
In the downloaded file, approve or reject the product. Rules for the columns:
Remember: the export contains a list of SKUs (one per variation). However, it is only possible to approve or reject the product itself, not the separate variation.
For the import, make sure that only one variation of a product is part of the mass quality control. Explanation:
|
|
| 3 |
Upload the file with the appropriate approval or rejection decisions.
Tip: Instead of the quality control exported file, the template can also be used. In this case, copy and paste the products to the template.
CSV and Excel files are supported.
|
|
| 4 |
See the feed table for import details:
|


Inline Editing
This functionality allows Quality Control agents to edit fast certain attributes of a product, without leaving the review page and opening the product form.
Configuration
| Step | Description | Image |
| 1 |
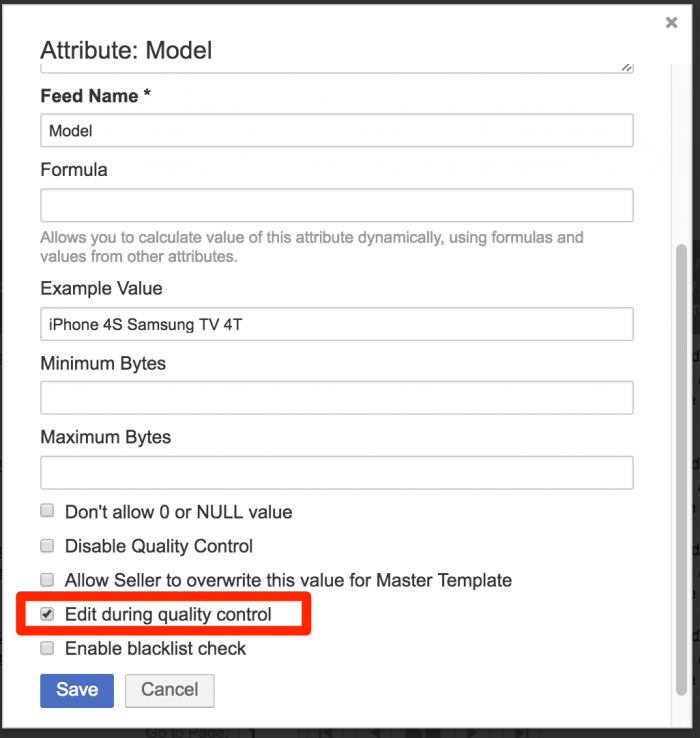
Go to Administration > Attribute Set Editor Chose a field you would like to be available for inline editing.
|
|
Product Quality Control Agent View
| Step | Description | Image |
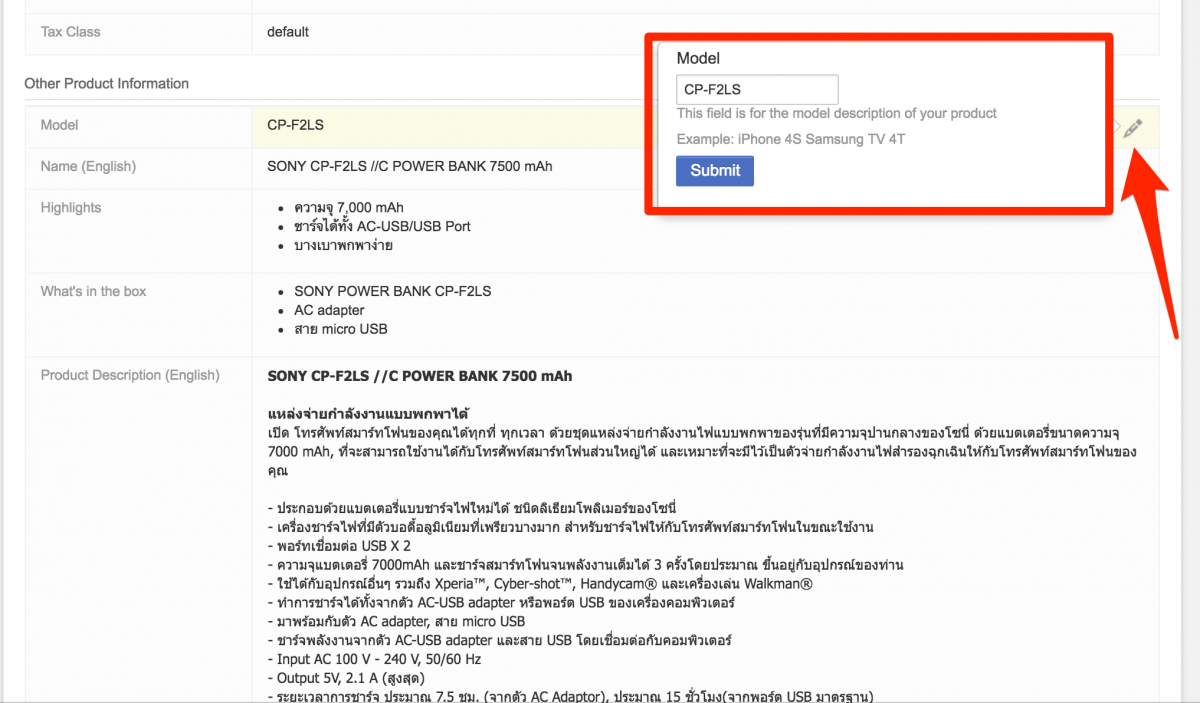
| 1 |
View the product in Product Quality Control. Fields available for inline editing can be modified in the same quick view. During quality control, all fields except for category fields (e.g., primary category) can be configured as editable. |
|
Reservation Flag
| Step | Description | Image |
| 1 | An informative reservation flag is displayed when another colleague is reviewing the same product. |

|
Frequently Asked Questions
There can be multiple valid flows that lead to this result:
- An attribute value is changed from A to B, which triggers quality control (QC). Later, the change is reverted while the product remains in QC.
- Images of the product are changed via adding or resorting, which triggers QC. Later, the change is reverted while the product remains in QC.
- Some HTML formatting is cleaned up without any visual changes.
- Product has been inactive for longer than seven days, so possible changes are automatically removed from the product history. The product history is internally saved to display possible differences.
- Seller has changed an attribute that was edited by an admin before product quality control. The attribute visibility was turned off, so therefore a possible difference can’t be displayed anymore, since only visible attributes are displayed on the review page.
Seller Center will always store the last person who has made changes to a product, regardless of what has been changed.
- If a Venture user makes status, stock, or price updates via CSV/API, this user will be logged even those these changes have been synced automatically to the Shop system.
- If a Venture user opens the product via GUI to check or confirm something on a product and exits the page via “Finish Editing,” the user will be saved as the last user. In order to avoid this, the Venture needs to use the back button of the browser or the navigation itself.
- If a Venture user downloads a CSV file for multiple products but just changes a single product in this file before uploading it, the user will be logged on all products. This is because all products have been processed during the feed update.
Products appear within the “new” filter when one of the following cases take place:
- product was created via UI, csv, api and all conditions are met to go to QC
- product already exists, but a new variation gets added
- product already exists, a new variation gets added, + content changes/updates happen in the same session => new content (updated attributes) are highlighted.