Variation Attribute Mapping
Contents
Objective
As a Venture, I only want to display certain variation or size options within certain categories.
- This way, I can make product creation and update easier for the Seller.
Additionally, based on the category, only certain sizes should apply to the product.
- This way, it will be easier for the Seller to define their available sizes since they can only use a defined size system.
Key knowledge This feature only allows you to map variation/size options.
Category Attribute Mapping Setup
In this feature, attribute options are mapped to certain categories so that Seller can only choose the most sensible options for product creation and update.
- If you want to enable Category to Attribute Mapping, please raise a TMLSD ticket. The parameter that needs to be enabled is catalog:category/attribute_mapping
- This feature works only for attributes of type dropdown or multi-select, as attribute options get configured, which should be visible on certain categories.
- In order to fully set this feature up, please provide the required attribute IDs (Seller Center attribute IDs) of the attributes you want to map within the ticket
| Step | Description | Image |
| 1 | Go to Administration > Category Setup | |
| 2 | Change to tab “Category Mapping” |
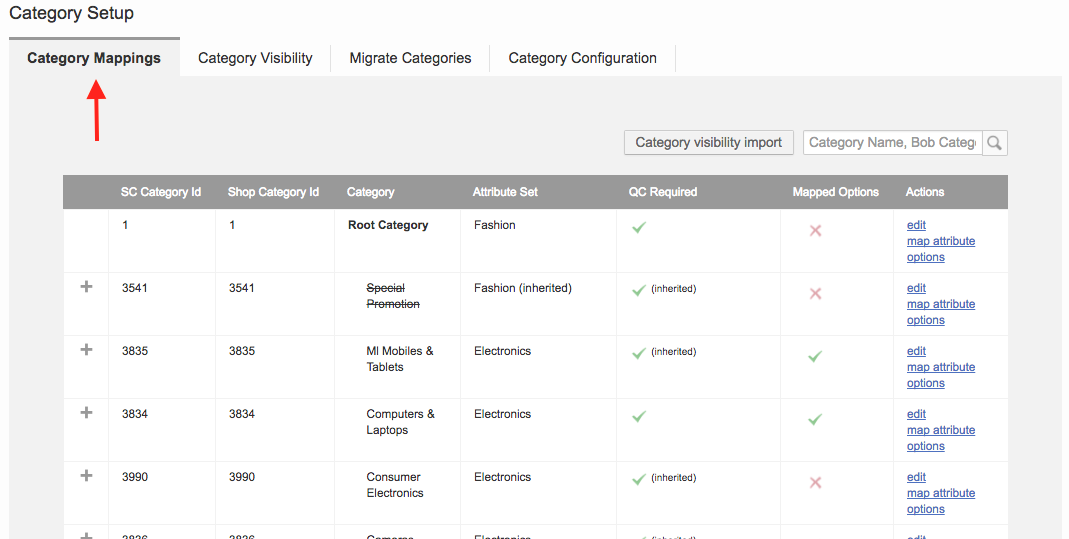
|
| 3 | Open the category you want to map (e.g., Fashion > Kids > Shoes) |
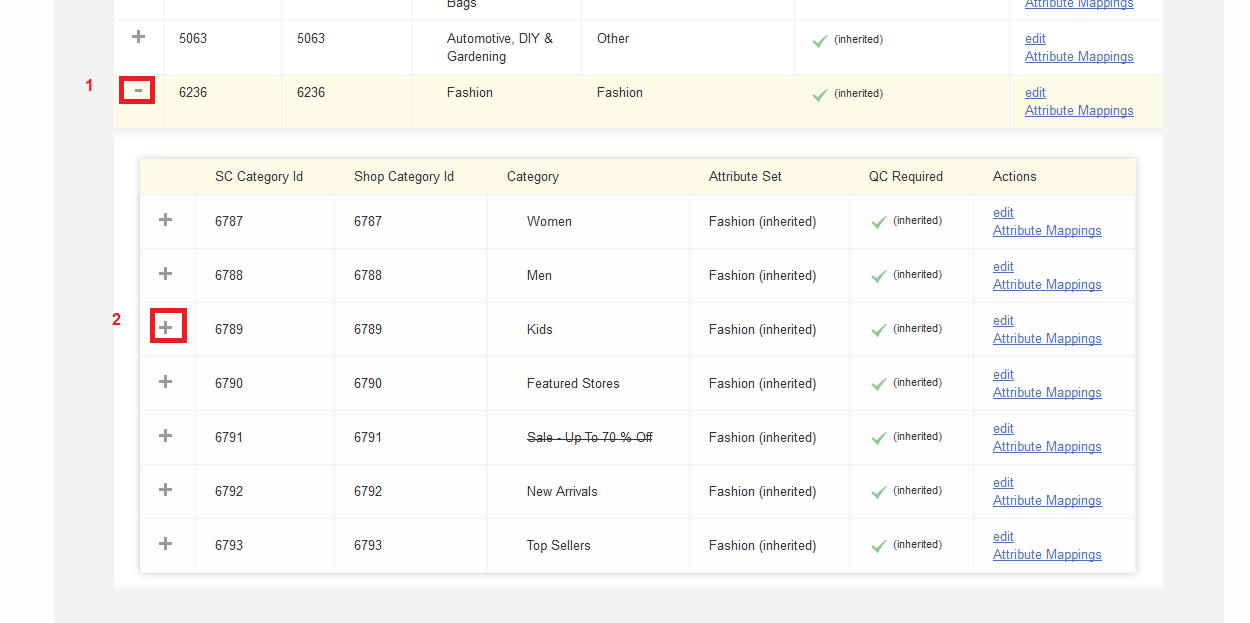
|
| 4 | Click “Attribute Mapping” |

|
| 5 | An overlay opens with all configured attributes that can be specified for the selected category. |
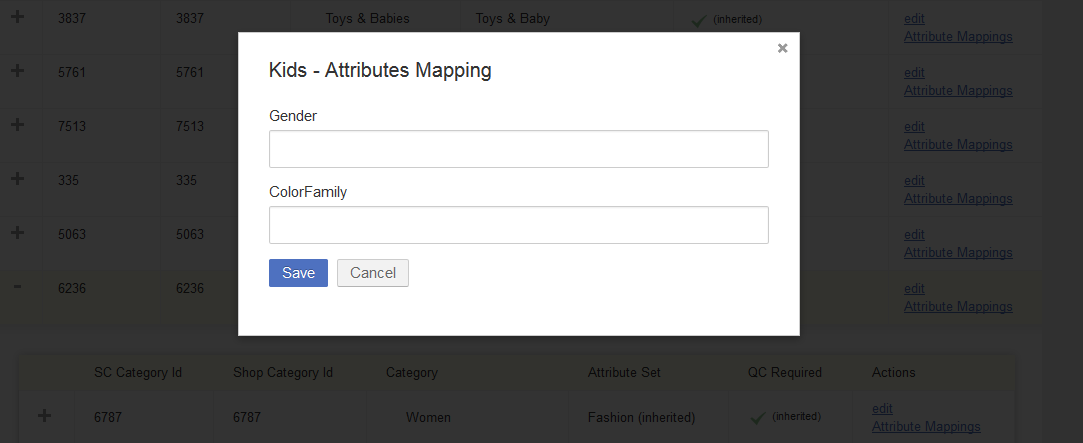
|
| 6 | Fill out the attributes by choosing suitable options. |

|
| 7 | Click “Save” |
Seller Visibility
| The Seller sees the possible options for the attributes when they create or update a product. |
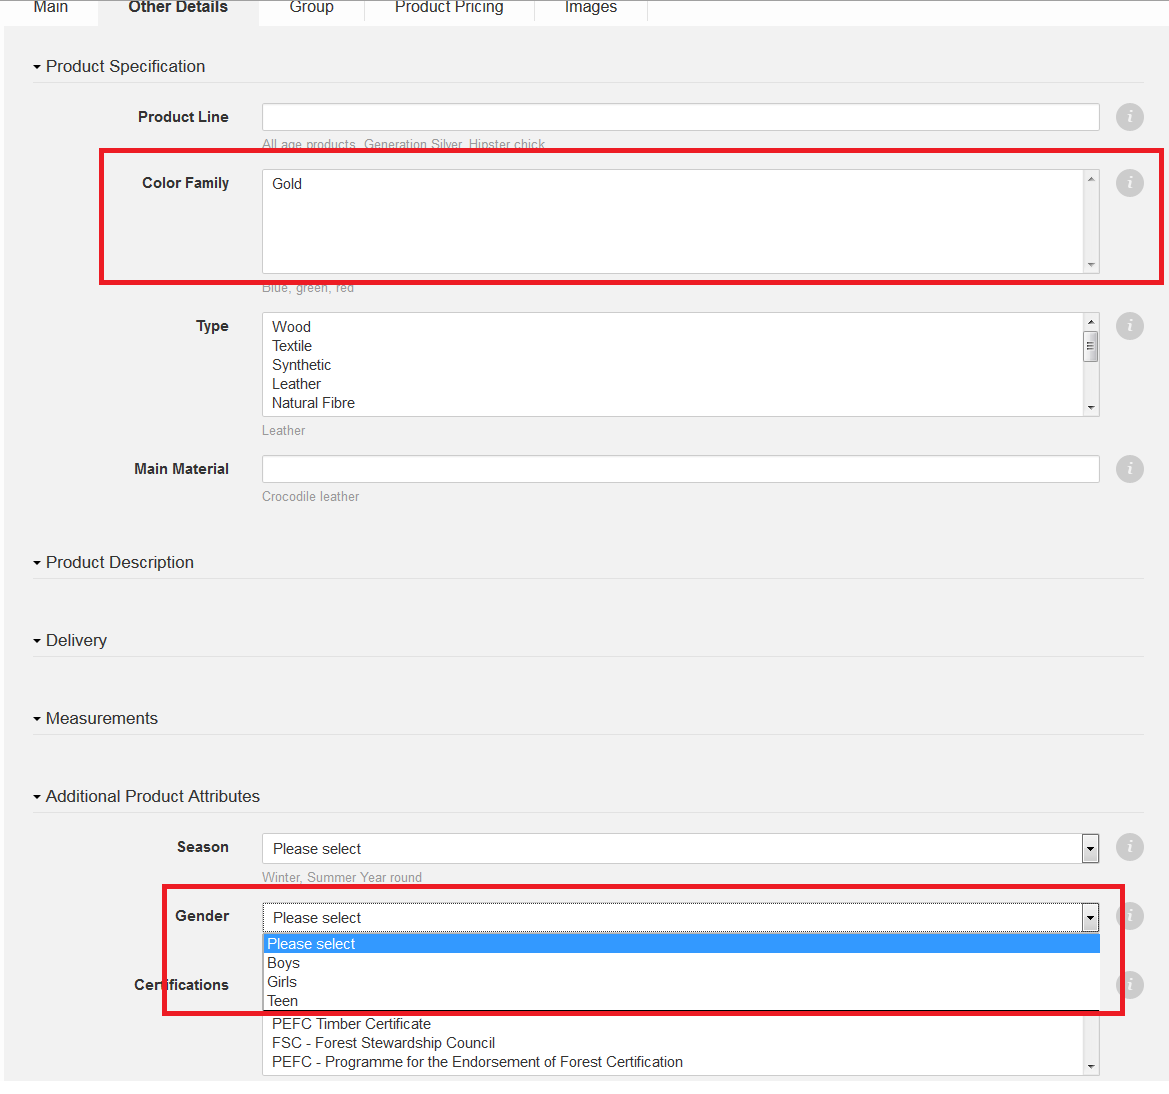
|
Size – Attribute Mapping Setup
During product creation when Sellers need to select sizes for their products, often a long list is displayed with all possible options. These options are often part of particular size systems, for instance, US or UK.
The purpose of this feature is to make it easier for the Seller to select which sizes they can provide to the customer. After selecting the size system, they are able to choose from a limited list of options.
Setup of Mapping
| Step | Description | Image |
| 1 | Go to Administration > Attribute Set Editor | |
| 2 | Switch to the tab “Attribute Mapping” |

|
| 3 | Click on “Add” to start a mapping between two attributes (source and target). |
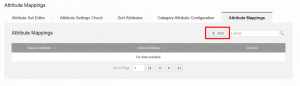
|
| 4 |
“Source Attribute”: This is the attribute that contains the size system, the base attribute. When selected (during product creation), the according target attribute options are displayed to the user. “Target Attribute”: This is the attribute that is mapped to the source. Depending on which option is selected from the source attribute, the available option of the target attribute changes. |

|
| 5 |
Select the correct attribute from each dropdown.
Make sure that the selected options belong to the same attribute set (displayed in brackets), or at least the same global attributes. Otherwise, it will not be possible to select these attributes.
|

|
| 6 | Click on “Next Step” to proceed with mapping the attribute option. |

|
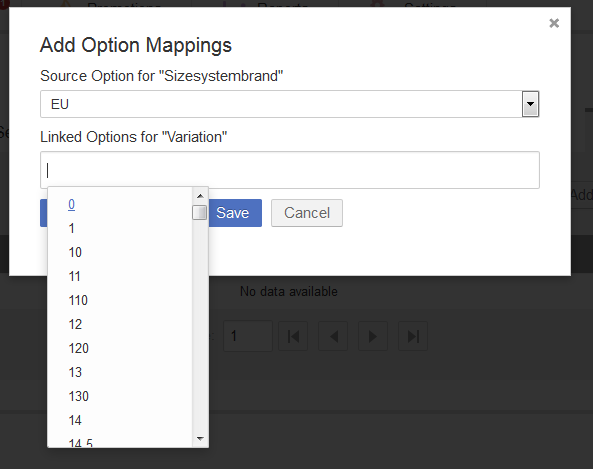
| 7 |
A window opens where the attribute options from the source attribute can now be assigned to attribute options of the target attribute. This means that, for example, the size options “XS, S, M, L, XL,…” will be matched to the size system “EU” (for European sizes). “Source Option”: This defines which attribute options from the linked attribute options will be available to be chosen from. “Linked Options”: These are the available options that will become selectable depending on the source option. Linked options can be selected either via scrolling through the list or via auto complete when typing the start text of an option. |
|
| 8 | Click Save & Add Another” to save the existing progress and continue creating another mapping, or click “Save” to simply save the current mapping. |
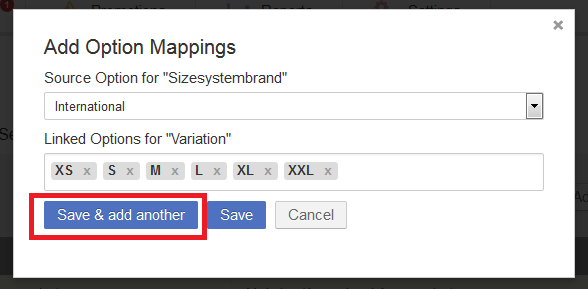
|
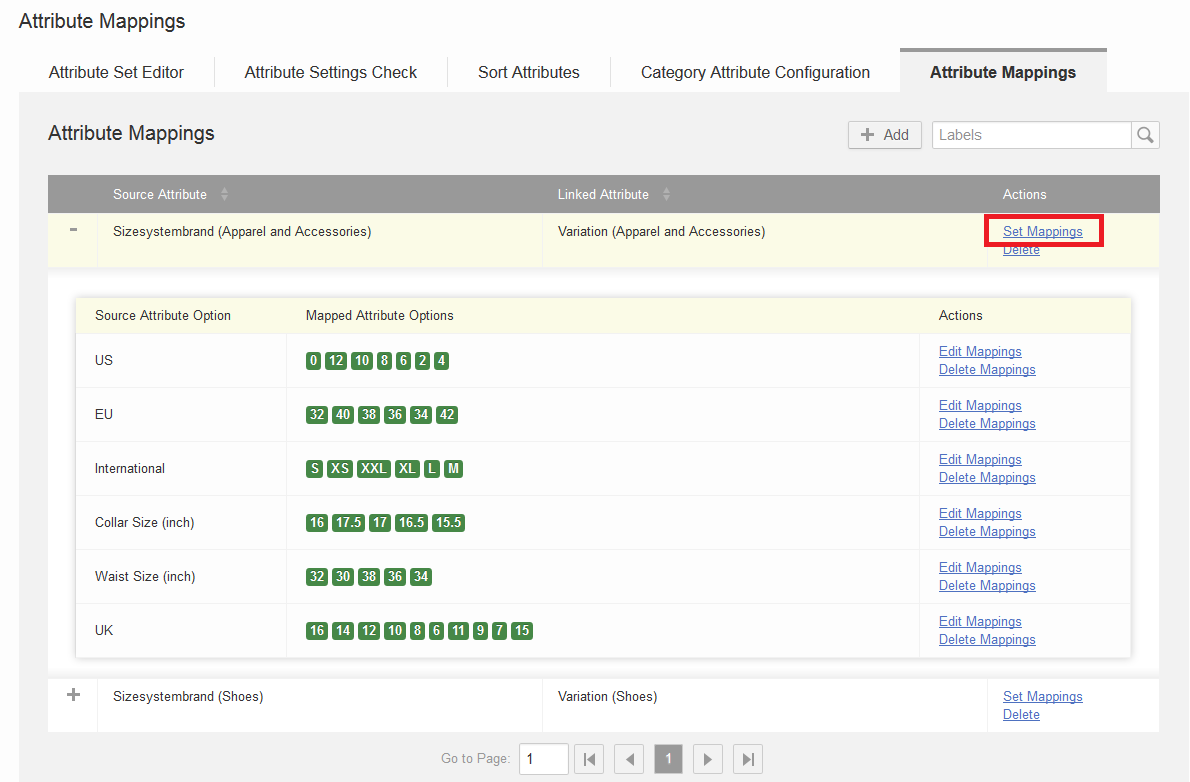
| 9 | Final overview |
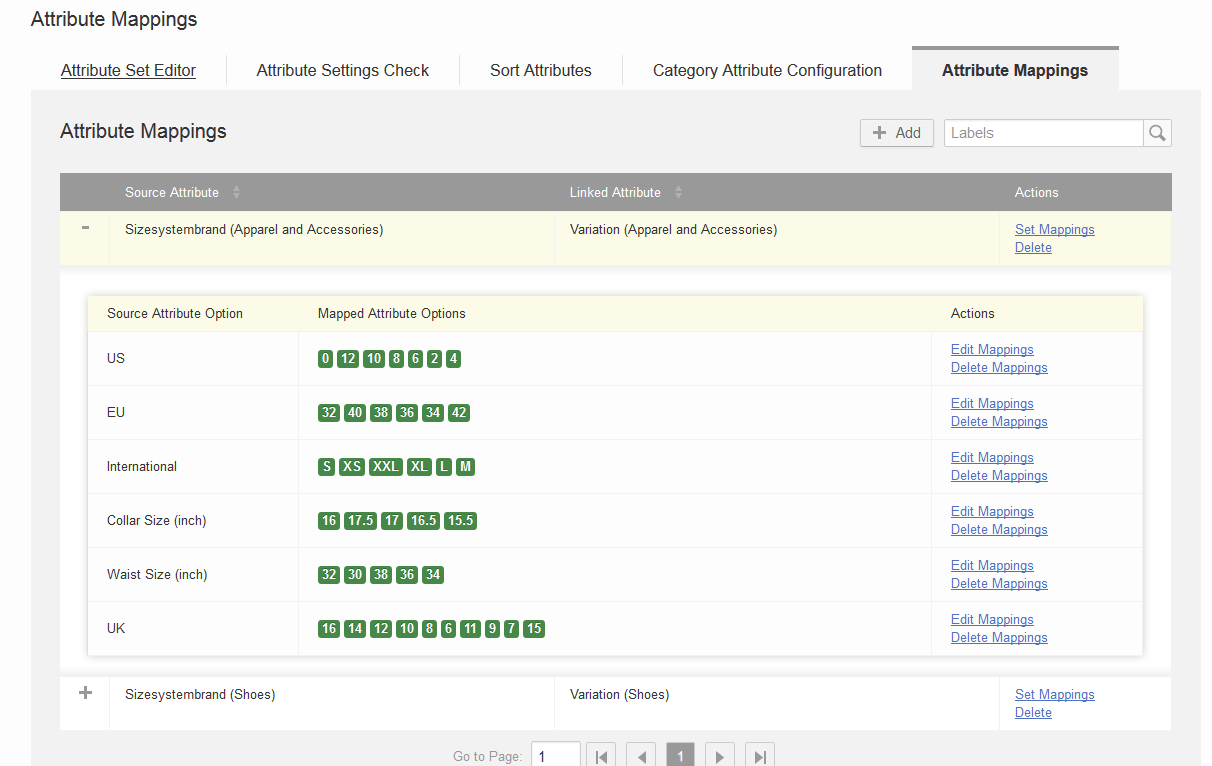
|
Adding Additional Mappings to Existing Ones
| Step | Description | Image |
| 1 | To add an additional mapping to an existing one, click on “Set Mappings” |
|
| 2 | Select the attributes that you want to add (see step 4 and 5 from previous section). |
|
Adding Additional Mapped Options to Existing Mappings
| Step | Description | Image |
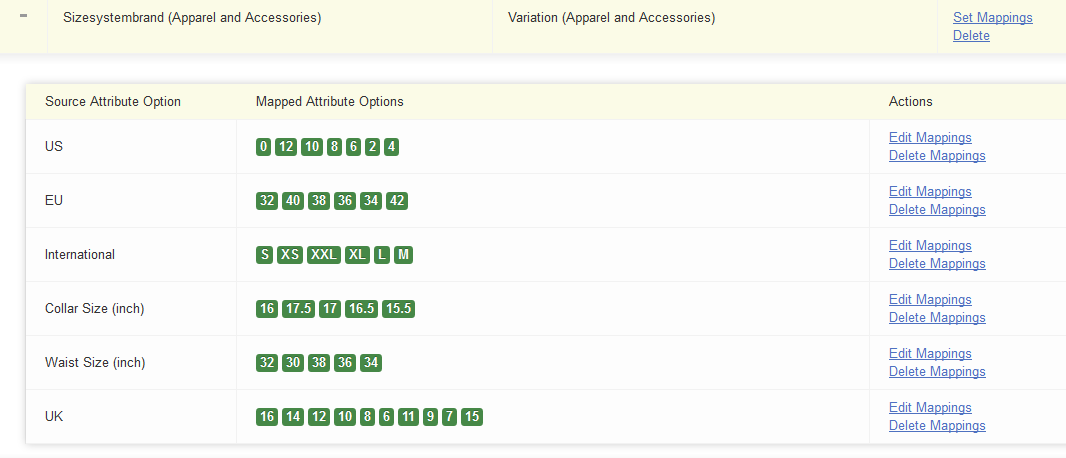
| 1 | Click on “+” to expand an existing mapping. |

|
| 2 | The mapping expands and all current option mappings are listed. |
|
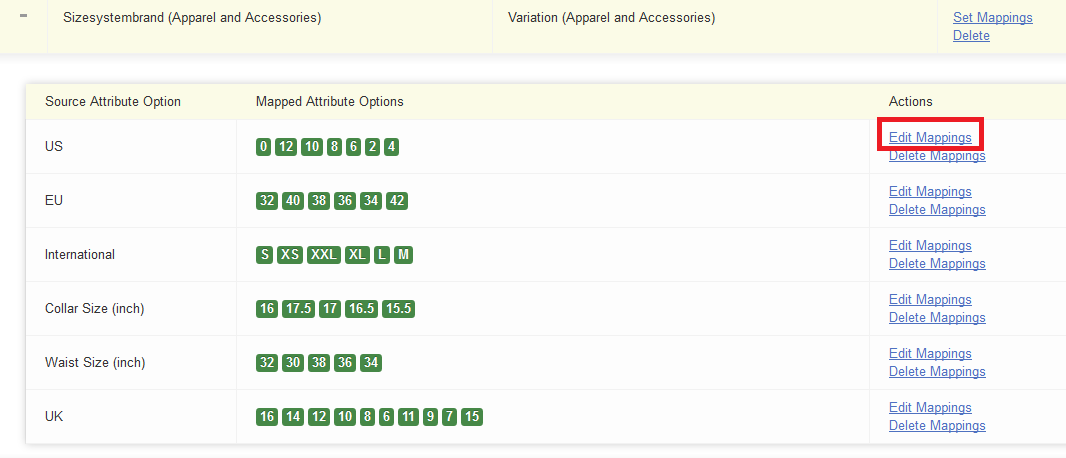
| 3 | To edit a linked mapping, click on “Edit Mappings” |
|
| 4 | Options can be either added or removed from the list. |

|
The order of the options is now based on their position ID from the Shop. This means that some options can still appear to be in the wrong order; however, this would be based on their positions within the Shop database.