|
Step
|
Description
|
Image
|
|
1
|
-
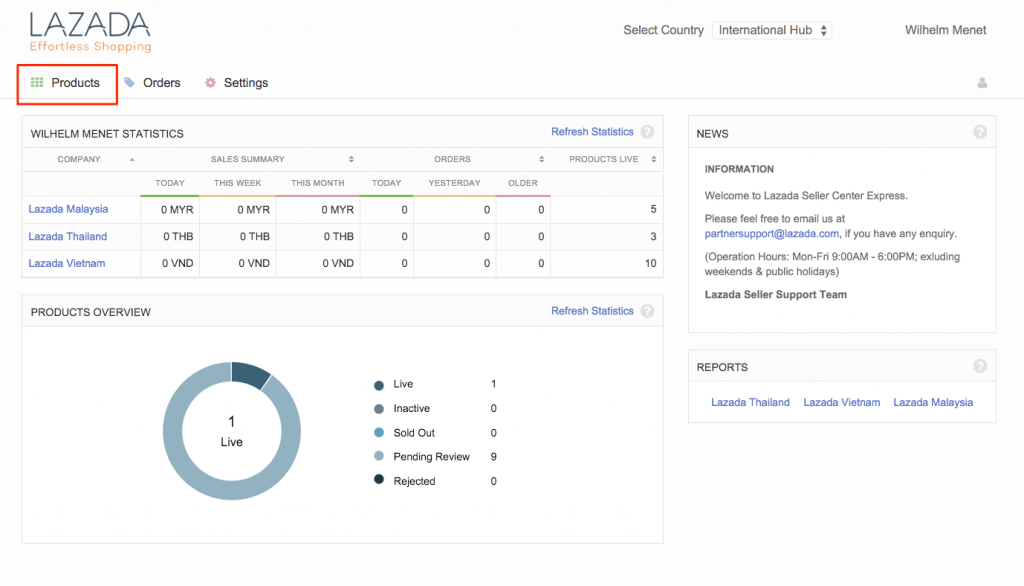
Log in to Seller Center Express and access the “Products” page from the menu.
|
|
|
2
|
-
Step 1) Download the template:
-
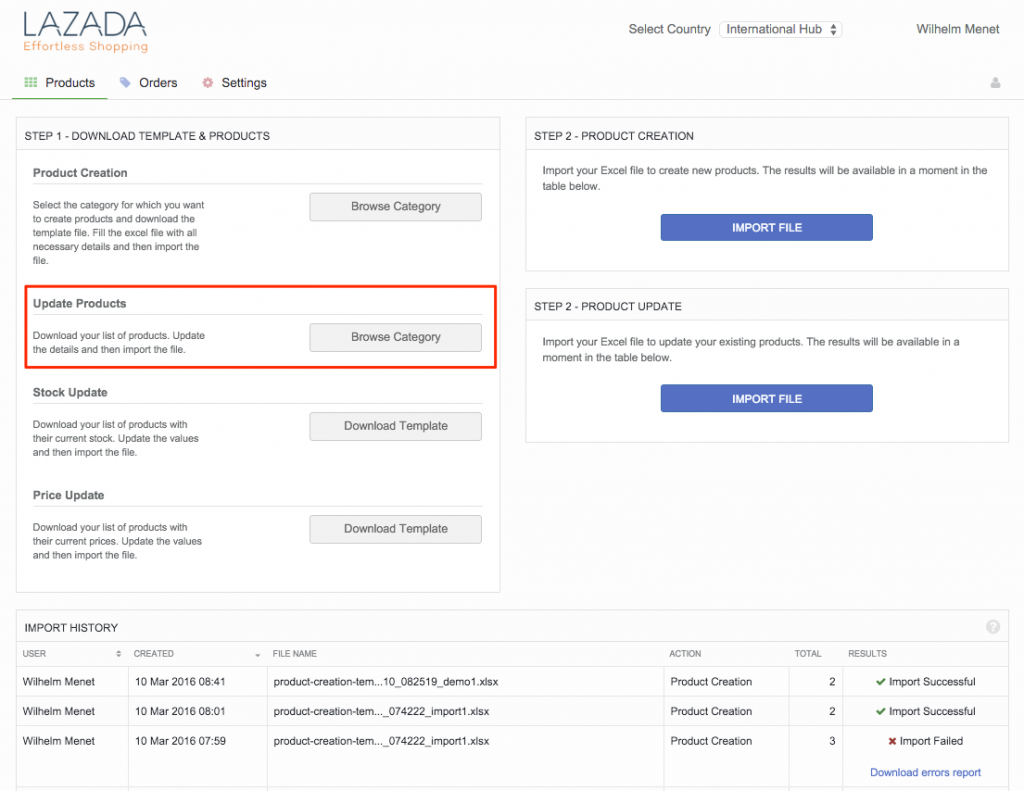
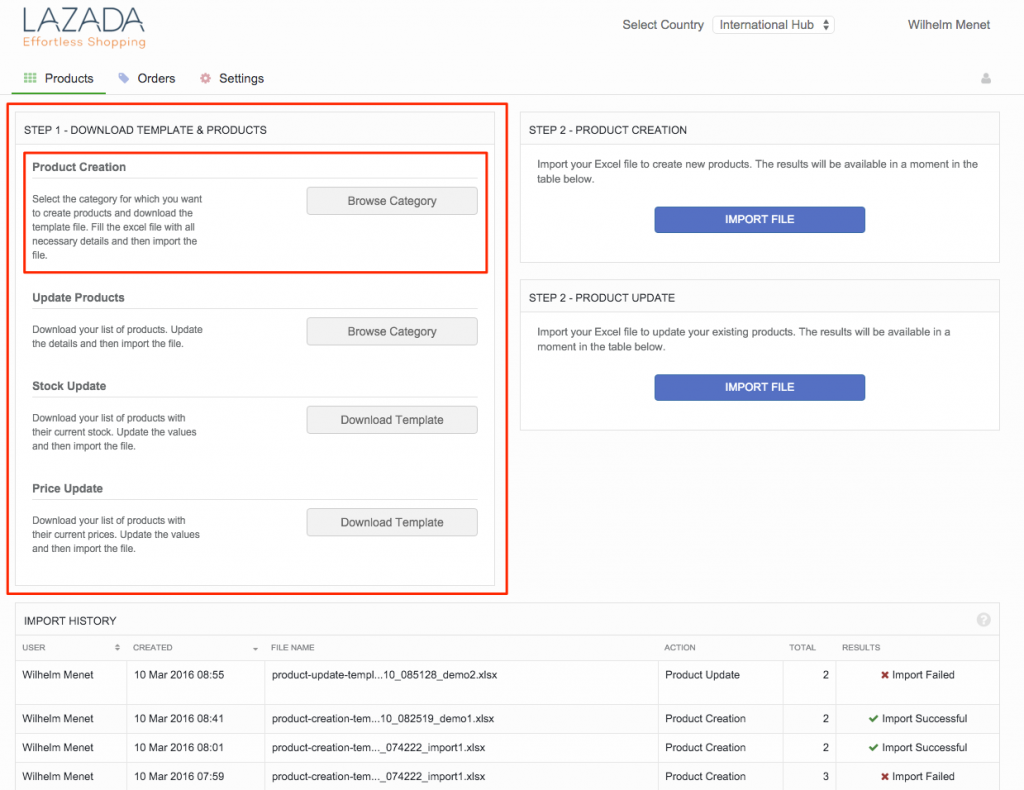
In the products page, select the “Product Creation” area and click “Browse Category”
-
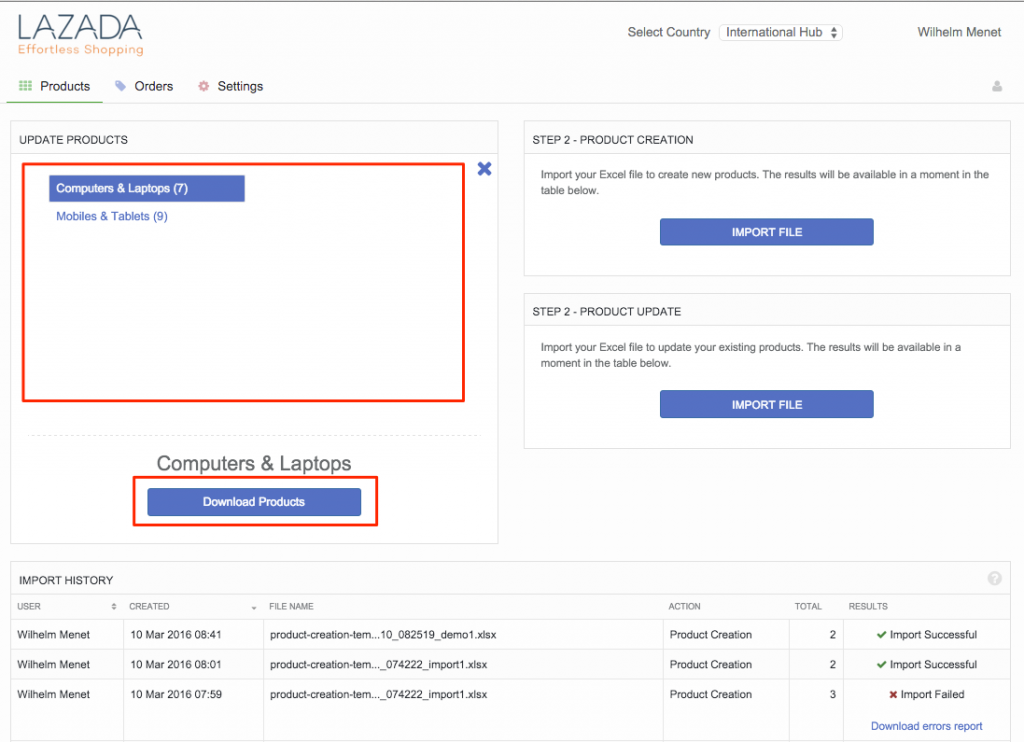
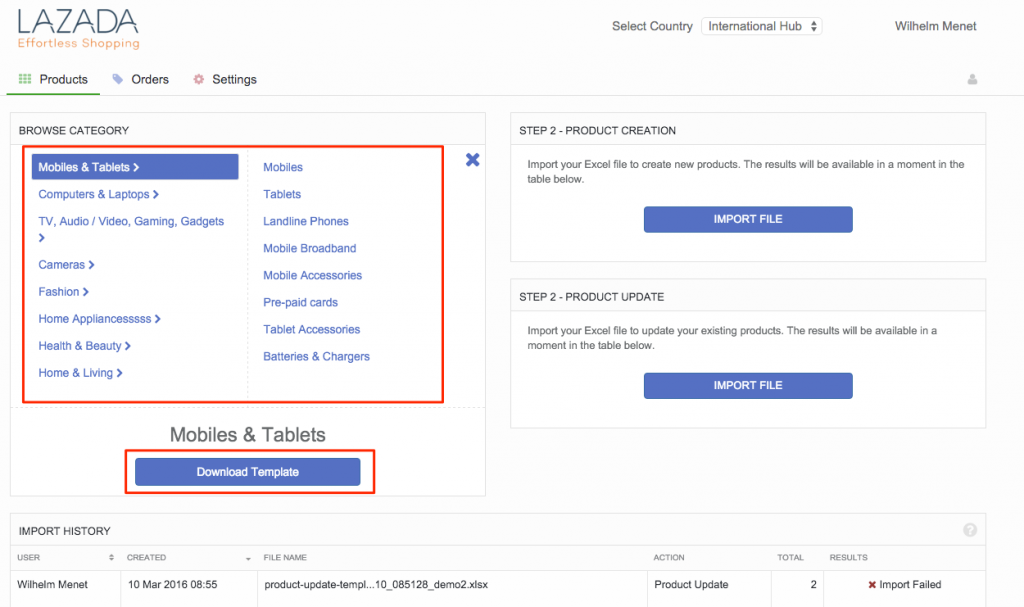
Select the category for which you want to create products (first or second category levels are available).
-
Download the template file.
|
 |
|
3
|
-
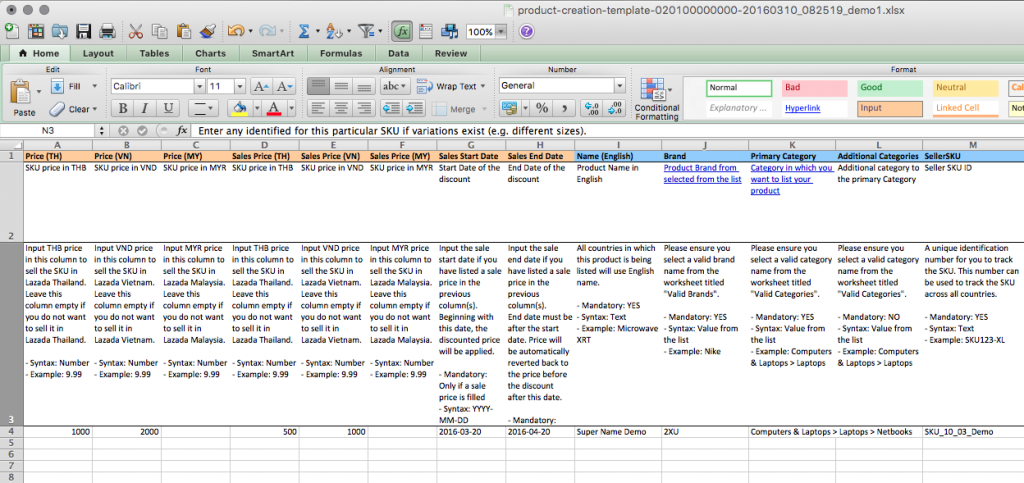
Step 2) Fill the Excel file with all necessary details. The file contains two kinds of attributes:
-
Prices: price information that is specific to a country
-
Mandatory attributes: attributes that are the same across all countries (e.g., “Product Name (English)”)
-
Prices:
-
The file contains only the price columns for the countries that the Seller is able to sell in. If a Seller can sell in TH, VN and MY (see Seller Setup), then the file will contain only those three prices columns.
-
To list a product in a country, the “Price” column has to be filled. If the price column is empty, then the product is not created in this country.
-
“Sales Price” is non-mandatory. If “Sales Price” is filled, then “Sales Start Date” and “Sales End Date” need to be filled.
-
“Sales Start Date” and “Sales End Date” apply for all sales prices. Different sales dates can be given in local Seller Centers.
-
“Price” and “Sales Price” must be given in local currencies.
-
Mandatory attributes that are the same across all countries (e.g., “Product Name (English)”):
-
SCX imports all mandatory attributes across all local Seller Centers and maps them together in order to have only one column per identical attribute.
-
A value given in the mandatory attribute (blue column) will be propagated to all countries where the price column is filled.
-
Brands can be selected from the “Valid Brands” sheet. Copy the value from the “Valid Brands” sheet and paste it into the “Brand” column.
-
Categories (primary and additional) can be selected from the “Valid Categories” sheet. Copy the value from the “Valid Categories” sheet and paste it in the “Category” column.
-
Variation can be selected from the “Attribute Options” sheet. Copy the value in “Attribute Option ID” from the “Attribute Options” sheet and paste it into the “Variation” column.
-
The template is in Excel and can be imported as it is in Excel. There is no need to save the file in CSV.
-
Examples in the screenshot attached:
|
|
|
4
|
-
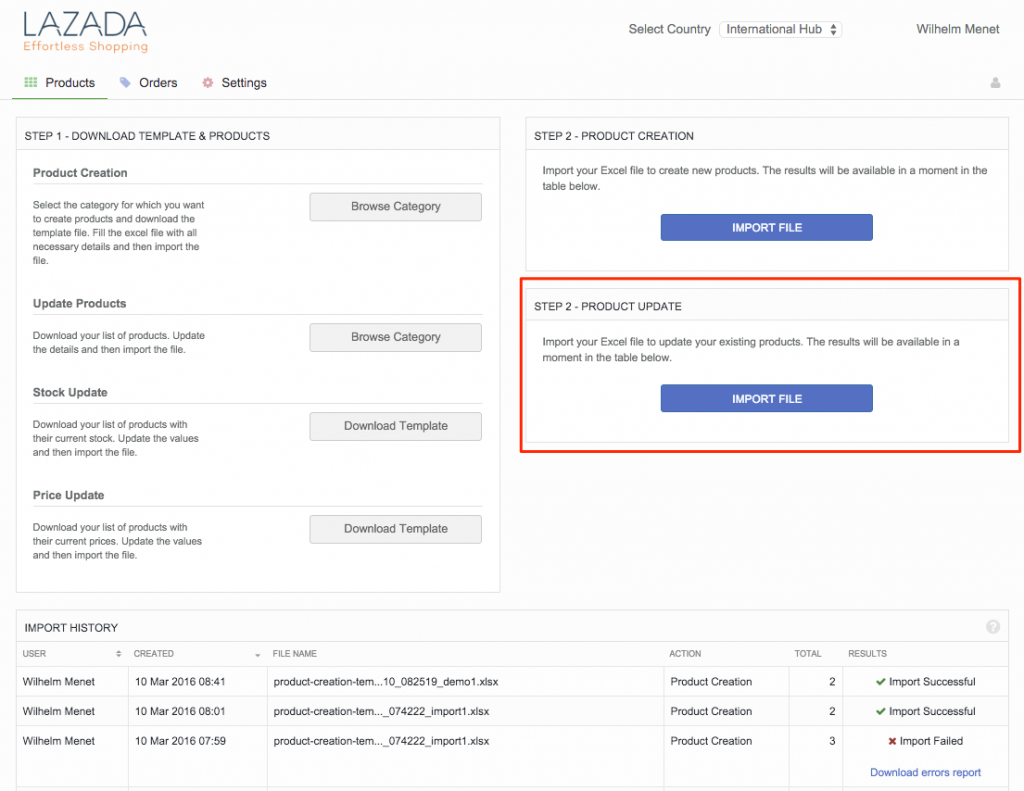
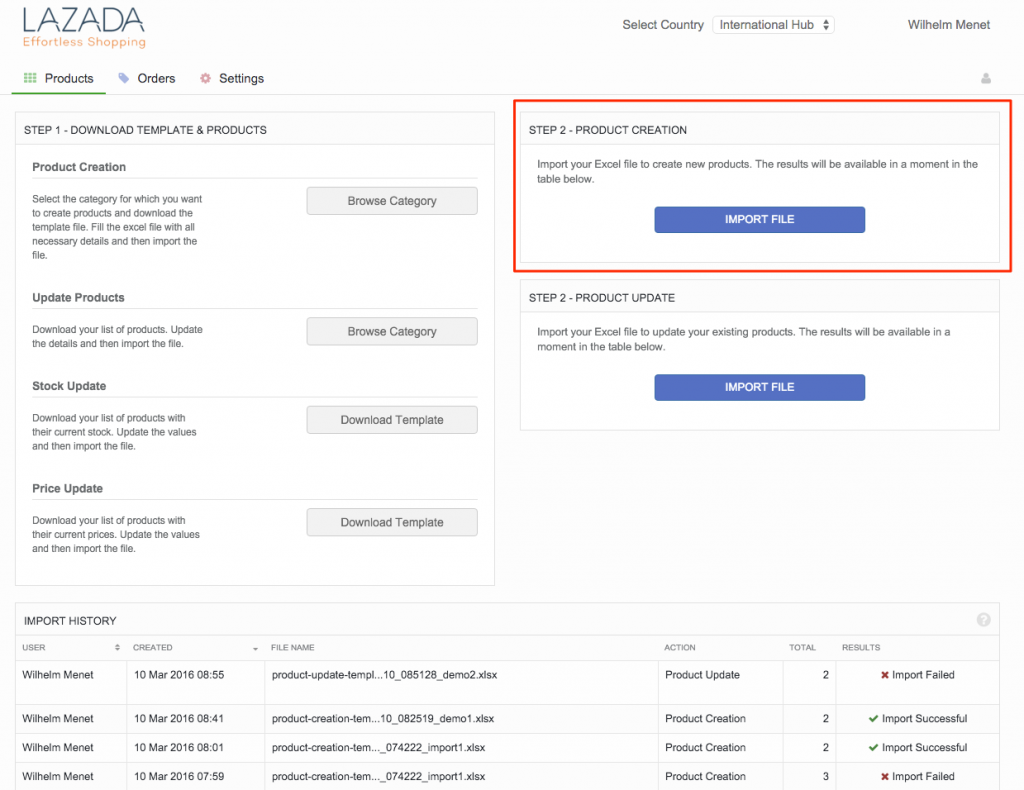
Step 3) Import the file for product creation.
-
There is no need to save the file in CSV before importing. The template is in Excel and can be imported as it is in Excel.
|
|
|
5
|
-
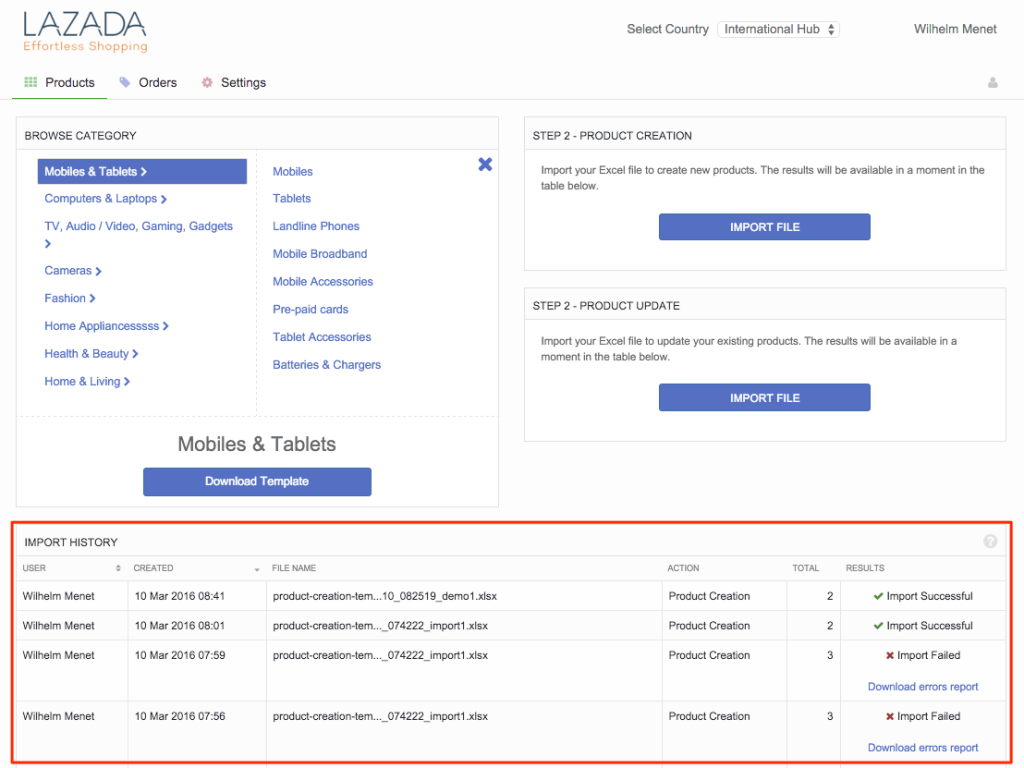
The output of the product creation will be displayed in the “Import History” table at the bottom of the page.
-
An import has three possibles results:
-
“Processing”: SCX is propagating the product in the local Seller Center. This step can take anywhere from one to a couple of minutes depending on the amount of products.
-
“Import Successful”: Products have been successfully created in all countries. You can access the local Seller Center to see the newly-created products.
-
“Import Failed”: A problem occurred during the product creation. An error report can be downloaded to review the errors. The imported file must be corrected and then imported again.
|
|


